Upcoming Changes to Trip Trak

dl - 1

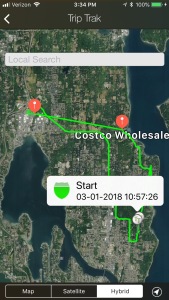
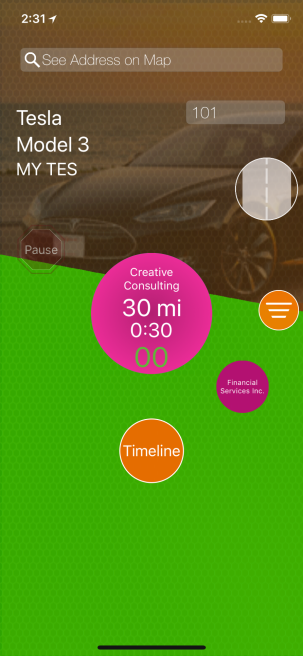
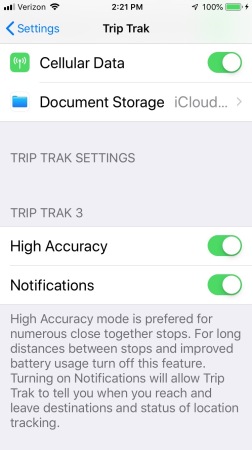
As I close in on the release of Trip Trak version 3.1.0, I want to tell everyone about some important changes that will be coming to the application. First and certainly the most important will be the addition of the “High Accuracy” mode and it will be turned on by default. High Accuracy will be expected to grab location data about every 200 meters or about 650ft. The application will also be gathering data both when the user is in a trip and also when logged in at a stop along the timeline. In the event Trip Trak is killed in the background the location tracking will fall back to the standard mode until the user opens the application during the trip, at which time the High Accuracy mode will start again. Turning off the High Accuracy mode will set the application to the standard mode that is documented in detail in a previous post.

High Accuracy mode will be hard on your  battery but I feel it is the best solution for users who travel in relatively small areas with multiple stops. It is good for people like delivery drivers. The standard mode is preferred for drivers often classified as “over the road” or those who are traveling longer distances with fewer stops.

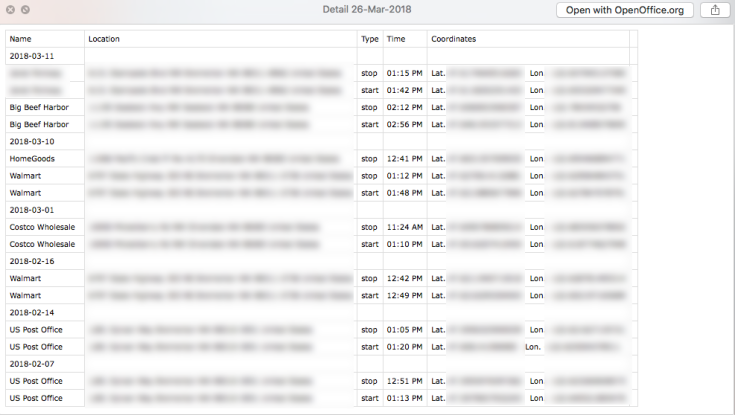
The standard mode will record location data no sooner than every 5 minutes with significant location changes only being saved. The standard mode will have minimal impact on battery usage with the Trip Trak app not even running in the background most of the time. Again, learn more about the standard mode here.

dl - 3

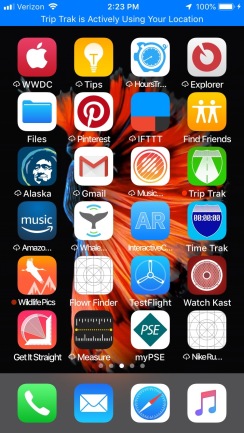
The next new thing is the blue bar at the top of the screen. Any time that the Trip Trak app is actively collecting location data the blue bar will be visible on the top of the screen and the words “Trip Trak is Actively Using Your Location” will be displayed. This has been an optional setting for a while but I doubt many, if any applications turn it on. Because user location data and the lack of privacy concerning that data has become an ongoing crisis for many companies I think now is a great time to let everyone know exactly when their data is collected even though it will not leave the phone until you ask for it.

One important thing to know about the blue bar is that “monitoring for significant location change” and “monitoring for region” (timeline and end location) are not considered as actively using your location.

So, in the real world, users will see the blue bar for the entirety of a trip using High Accuracy mode but in the standard mode users will see the blue bar when starting a trip but once the first location has been reached Trip Trak closes out the active location tracking relying on regional and significant change services for the rest of the trip. When that happens the blue bar will go away.

dl - 2

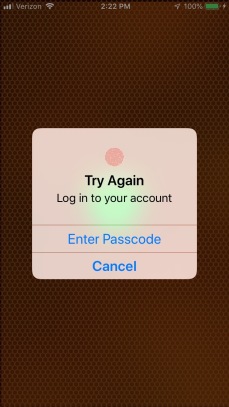
The third new thing will be an added layer of security. Once a day users will be asked to unlock the Trip Trak app with Face ID, Touch ID, or the phone’s passcode. It is an added layer of security that does not require any additional accounts or passwords. Users are simply reaffirming the process of unlocking the phone.

Thanks for taking the time to read about these exciting new features and the new update will be available soon. You can download your very own copy of Trip Trak at the link below.

Download_on_the_App_Store_Badge_US-UK_135x40

Trip Trak – Authorizing Location Tracking

IMG_1128

I am currently working on Trip Trak version 3.1.0 and hopefully it will be available in a public beta in a couple of days. Today I want to explain the different levels of Location Services offered on the iPhone. Commonly known as location tracking. It sounds really straight forward from Apple but in reality becomes rather confusing when trying to accurately define the term “When in use”.

First of all, the only way Trip Trak works is if Location Services are authorized to either the “When in use” or “Always” levels. Without authorization the app does not work at all and you will be just wasting your time. For Trip Trak location services also operates in the background during a trip under some circumstances. What that means is that technically during a trip the application is still “in use” even if you are using a different app and there is no need to keep the Trip Trak app active in the foreground. That sounds cool, so I should just stick with the “When in use” setting to be on the safe side, right? Well, no it does not. This is because that when you arrive at a location on your timeline Location Services are turned off and shortly there after the application should lose it’s “In use” status. At that point the Trip Trak app asks the iPhone’s operating system to wake it up when it leaves the location. When exiting the location the operating system opens the Trip Trak app in the background for a very short period of time. It is during that time that Location Services are activated to monitor for significant location changes. Every time a location change is detected the Trip Trak application wakes and records the location data and then closes. During these times the operating system does not consider the app “In use” because you did not open and use the app. Thus if your Location Services setting is “When in use” it will never restart the location service to monitor for significant location changes. The “Always” setting allows all this things to happen.

At this point you may be wondering why would anyone create such a convoluted system flow? The answer is very simple, battery power! Taking the approach I do uses only a fraction of the battery power required otherwise. It also allows the user to spend an extended amount of time at one or more stops along the timeline without any impact on the battery and then restarts when on the move again. All hands free. I believe a user could  use the more restrictive “When in use” level if you were to leave the Trip Trak app as the front most app, in the foreground, for the entire trip but I whole heartily recommend using the “Always” setting.

Please let me be very clear about your privacy. First, it makes no difference if you select the “When in use” or “Always” setting. Trip Trak does not use any of your location data nor does it allow any third-party access to your data. All your data is stored locally on your iPhone until you export it or delete it. Period.

Your mileage may vary. Things change often with Apple products and sometimes the documentation available is not strictly accurate. Someone may want to nitpick my analysis of how all these thing actually work but this is my interpretation of the documentation along with my real life experience of using the Trip Trak app on a regular basis. Truth is that every iPhone user is delivered a different experience based on which apps they use, how often, and how long they use them so the actual real life experience my be slightly different in keeping Trip Trak active on your phone.

Thanks for reading folks, if you don’t already have a copy of Trip Trak you can get one at the link below.

Download_on_the_App_Store_Badge_US-UK_135x40

Privacy – You Have It Here

In the wake of new privacy reporting rules and revelations that many iOS applications that require location data to function are selling said data with out the users being fully aware of the data distribution, I want to mention a couple of things about how Trip Trak handles users private data. This is essentially a repost of the privacy post I made a few months ago. There will also be a dedicated privacy page coming in the next week or so. The intention of the Trip Trak app is to keep your data private. Trip Trak users should understand that when using the app.

  • Location data is never transmitted to a server or third-party.
  • Trip Trak does not collect data or maintain a database of user identifiable information or device. (Such as names, email address, or uuid.)
  • Data is only transmitted at the users direction and is only transmitted by means of Apple provided frameworks.
  • Trip Trak conforms to GDPR regulations in that it has no data to report.

Here is what I wrote months ago.

 The way things are now all your data is stored locally on your phone and the only way that data leaves the phone or is exposed to other applications is if you as the user directs the application to share that data. Trip data includes dates, times, and location of your movements that can be extremely precise so to me it is important that data remains protected. There are really only two ways that I could sync data across devices and computers.

1. I could employ my own servers, store your data and distribute it as needed, but I would be subject to law enforcement oversight and hacking attempts. In addition to that, server space costs money and I would be forced to charge a monthly subscription fee or, like some other apps, sell your data in an “anonymous” manner. 2. I could sync through a cloud service like iCloud. This could be an acceptable method for many but it just might not be right for you. Not to disparage the security of any service, I believe most do the very best they can, but there is no guarantee you data will not be compromised or turned over to law enforcement.

In the end I decided that the best way to protect my customers privacy is to let them decide how and when their data is distributed. As it has always been the Trip Trak app does not store, share or allow any third-party to access customers data without explicit direction from said customer. This may feel cumbersome to some of you but rest assured it is how you will know that your personal data has not been compromised.

If I was trying to make Trip Trak an enterprise application there would be no question for me that storing data on a server would be done, but Trip Trak is a personal/consumer app and personal privacy should be maintained. As I think about it, the single safest place for your data to be stored is on your iPhone. Mind you I said “single safest” and important data should always be saved in more than one place. That is why I recommend users export their data in the form of a report on a regular basis. For me personally I export reports to my Trip Trak iCloud container and prepare invoices, and tax reports on my computer.

You can download your own copy of Trip Trak at the link below.

Download_on_the_App_Store_Badge_US-UK_135x40

Trip Trak Free Downloads

Trip Trak normally costs $3.99 USD. It has no up-sells and no ads at that price. Simply pay one price and use it in full trim for the life of the application. This week I am going to do something I have not done before. The full version of Trip Trak will be available as a free download from Aug. 16 2018 to Aug. 19 2018. Once again, this will be the full version and is not anykind of trial, you own it forever. If you are interested pick it up free, try it and if you like it tell a friend.

Trip Trak puts safety and security first when driving to and from unfamiliar job sites. Trip Trak is the hands free solution for entrepreneurs and contractors who need to keep track of their travel and expenses with arrival and departure times. Users simply build a timeline for the day and start the trip. Timelines can be populated with Contacts and Calendar events as well as the traditional methods. Trip Trak records your arrivals and departures automatically and even records the end of day when you arrive back at the office or home. With Trip Trak users can even start a new trip with one push of a button in a Today Widget.

You can download a copy of Trip Trak at the link below and remember Thurs. to Sun., it is free.

Download_on_the_App_Store_Badge_US-UK_135x40

#lessthanacupofcoffee


Trip Trak 3.0.1 Released

Version 3.0.1 was released today. It is a minor update that primarily cleans up the user experience making the interface transitions smoother. It also fixes a bug that prevented users from adding calendar events to the timeline.

The next update is planned to have Siri integration. In keeping with the “hands free” theme of the app, Siri will be a welcomed asset for starting new trips. For the past several months I have been trying to integrate the feature and the results have been disappointing. With the September release of iOS 12 comes a major upgrade to Siri capabilities that should allow it to work well with the Trip Trak app. Along with a major revision of the Apple Watch app the next version of Trip Trak will be a huge improvement.

 Trip Trak is the hands free solution for entrepreneurs and contractors who need to keep track of their travel and expenses with arrival and departure times. Users simply build a timeline for the day and start the trip. Timelines can be populated with Contacts and Calendar events as well as the traditional methods. Trip Trak records your arrivals and departures automatically and even records the end of day when you arrive back at the office or home. 

You can download your own version of Trip Trak at the link below.

Download_on_the_App_Store_Badge_US-UK_135x40

Expense Reports in Trip Trak 3.0

Expense reporting is very similar to the trip reports with only one real exception. You will only be able to choose from the latest week, month, or year to fetch data when building the report.

IMG_1142

After selecting your time range just export like the trip report by selecting the action button. A sharing sheet will appear with all the apps and services you have installed that will accept a .csv type file.

Below is a picture of what an exported report looks.

expenses

Super simple.

You can download a copy of Trip Trak 3.0 at the link below.

Download_on_the_App_Store_Badge_US-UK_135x40

Building History Reports with Trip Trak 3.0

Last time I showed you how to look at your trip history on the phone, today it is time to show you how to create a report and export it.

When you are on the History page you will see a button on the upper right titled “Reports”. If you have one or more trips logged you may select it and you will be taken to the reports screen as seen on the above left image. At the top of the screen is an overview of the trips in the selected date range. At the bottom of the screen are the two date selection wheels. On the left side is the “Include Detail” switch. There are two reports that are created on this page, the Summary Report which shows the start and end data and the Detail Report which shows all the stops within the selected date range along with location coordinates and times. Please note that if you don’t record stops with the timeline you will not have the option to include a detail report. 

Once you have selected your dates and report type you hit the action button (the square with an arrow at the top) and you will see a sharing sheet. Your sharing sheet may look different as all your apps and services that are registered to accept .csv type files will appear here. You should be able to export your reports applications like Numbers, XL, and Open Office or you can do what I do and save the reports to a storage service like iCloud, Google Drive, or Dropbox and then send the data to applications on my computer where I can create invoices and perform other bookkeeping tasks.

SummaryReport

DetailReport

Above, you can see how the two reports are structured.

Next time we will look at expenses and the report it generates. It is almost the same, just slightly different.

You can download a copy of Trip Trak 3.0 at the link below.

Download_on_the_App_Store_Badge_US-UK_135x40

Trip History in Trip Trak 3.0

Every trip you make with Trip Trak is recorded and available for you to view on your phone. You can delete trips that are not needed and export the rest as a report. Next time I will explain how to build reports but for today I will just show how to view your history of trips. After having completed one or more trips you can access the history by selection the History button in the sub-menu.

The picture on the left shows the sub-menu and the history button is the one that looks like a clock face. Pressing the History button will take you to the History page where you can scroll through all of the recorded trips. Just swipe to the left to delete any particular trip. Displayed are the dates, start, finish addresses, total time, and distance driven. Selecting any of those trips will take you to a graphical documentation of the trip on a map. When looking at the map you will see start and finish pins that have pop ups including the date and time. Your driven route is shown with green lines and the red pins show your timeline stops.

Next time creating reports from your history and exporting those reports.

You can download a copy of Trip Trak 3.0 at the link below.

Download_on_the_App_Store_Badge_US-UK_135x40

Building a Timeline with Trip Trak 3.0

To get the most out of the Trip Trak app users need to build and maintain a timeline. Fortunately it is a pretty painless process. Start by pressing the “Timeline” button in the center of the home screen. When the Timeline screen appears you will need to set the end location first. You can toggle between “Office” and “Home” as your ending location. Do this by selecting the “H” or “W” button in the upper right hand area of your screen. Press and hold your selected button and you will be prompted to input the address of your home or office. You only need to do this once for each location.

Simulator Screen Shot - iPhone X - 2018-03-19 at 14.14.27

You can add stops to your timeline three different ways.

Press the round “+” at the bottom and you can input a name and address manually.

Simulator Screen Shot - iPhone X - 2018-03-19 at 14.14.47

Users can also create a stop from the phone’s Contacts app. Select the button with the people silhouettes to open a contacts page. Simply select the person or business you will be stopping at and the relevant data will be imported and added to your time line. Trip Trak will display the business name of the contact if available. When phone numbers are provided a green phone button will appear to the right of the contact info and you can use that button to initiate a phone call if you want to contact that person. Third, if you have a calendar event for that day the Calendar button at the bottom will be displayed in green. Press the green bar and the calendar event, if it has the needed data will be added to your timeline.

After you have created the timeline you can easily manage the contents. Swipe to the left and you can delete individual entries. Press the edit button and you can delete individual entries or re-arrange the entries by pressing the thee bars to the right of the entry and move it up or down as desired. You can also remove all the entries at once by pressing the “Clear All” button.

When finished just hit the back arrow and the main screen will appear with your newly created timeline. Your first destination will appear at the top with the distance and travel time listed. As you progress in a trip through stops the completed destinations appear to the left in gray.

Simulator Screen Shot - iPhone X - 2018-03-19 at 14.31.11

And that is how the timeline works. You can download a copy of Trip Trak 3.0 at the link below.

Download_on_the_App_Store_Badge_US-UK_135x40

Getting Started With Trip Trak

Before recording a trip with Trip Trak all new users need to create a profile vehicle to which the data will be recorded. As part of the on boarding process the first time start will take users to the Vehicles page and explain the process of building a profile vehicle. When that happens your phone will also ask you for authorization to track your location. You should use the “Always Allow” setting so you will still track in the background and restart tracking when you exit a job or appointment.
Simulator Screen Shot - iPhone X - 2018-03-16 at 10.03.45

After that you will see the instructions to create a new profile vehicle.

Simulator Screen Shot - iPhone X - 2018-03-16 at 10.03.54

The rest is easy, just input your make, model, color and license number. You can use any values you wish. Next is the image. You can take a picture or use an image from the Photos app. You will be prompted to authorize Trip Trak to Access your library or to use the camera. Once you have an image resize it to fit in the square. Then choose it and hit the “Save Vehicle” button. When the new vehicle information appears you can select it or simply hit the back arrow to get to the main screen. Anyone who is concerned about authorizing the app to use camera or photos library, you don’t have to authorize it. If you choose not to authorize the default profile image will be assigned to your new vehicle. An initial value of 100 mi/km will be assigned to your new vehicle so when you start a trip be sure to input the correct mileage. Users can create as many vehicle profiles as they wish and can switch from one to the other when not on a trip.

You can download a copy of Trip Trak at the link below.

Download_on_the_App_Store_Badge_US-UK_135x40